Aloe vera is one of the most beloved indoor plants, prized for its medicinal properties, low maintenance, and sculptural beauty. However, even hardy succulents like aloe need attention from time to time, particularly when it comes to repotting. Over time, aloe plants can outgrow their containers, deplete soil nutrients, or develop crowded roots, all of which can hinder growth and vitality.
Repotting your aloe doesn’t have to be intimidating. With the right technique, you can give your plant fresh soil, more room to grow, and a thriving environment for years to come. Here’s a comprehensive guide to repotting your aloe vera in 8 simple steps.
Step 1: Choose the Right Time to Repot
Timing is critical for succulents like aloe vera. The best time to repot is during spring or early summer, when the plant is actively growing. Avoid repotting in winter, when aloe is in a slower, dormant phase.
Signs your aloe needs repotting include:
- Roots growing through drainage holes.
- Soil that dries out extremely quickly.
- The plant looking crowded or top-heavy.
- A pot that has become too small for the growing rosette.
Repotting at the right time ensures minimal stress and faster recovery.
Step 2: Select a Suitable Pot
Aloe vera thrives in well-draining containers. When choosing a new pot:
- Pick one 1–2 inches larger in diameter than the current pot.
- Ensure the pot has adequate drainage holes to prevent root rot.
- Terracotta or unglazed ceramic pots are ideal because they allow soil to dry more effectively, reducing moisture buildup.
Avoid deep pots; aloe’s roots are shallow, and a wide, shallow container encourages healthy growth.
Step 3: Prepare the Soil
The right soil is key for aloe’s health. Use a succulent or cactus-specific potting mix. You can also make your own:
- 2 parts potting soil
- 1 part coarse sand or perlite
- 1 part small gravel or pumice
This mix ensures excellent drainage, preventing soggy soil that could cause root rot. Add a small amount of activated charcoal if you want extra protection against fungal growth.
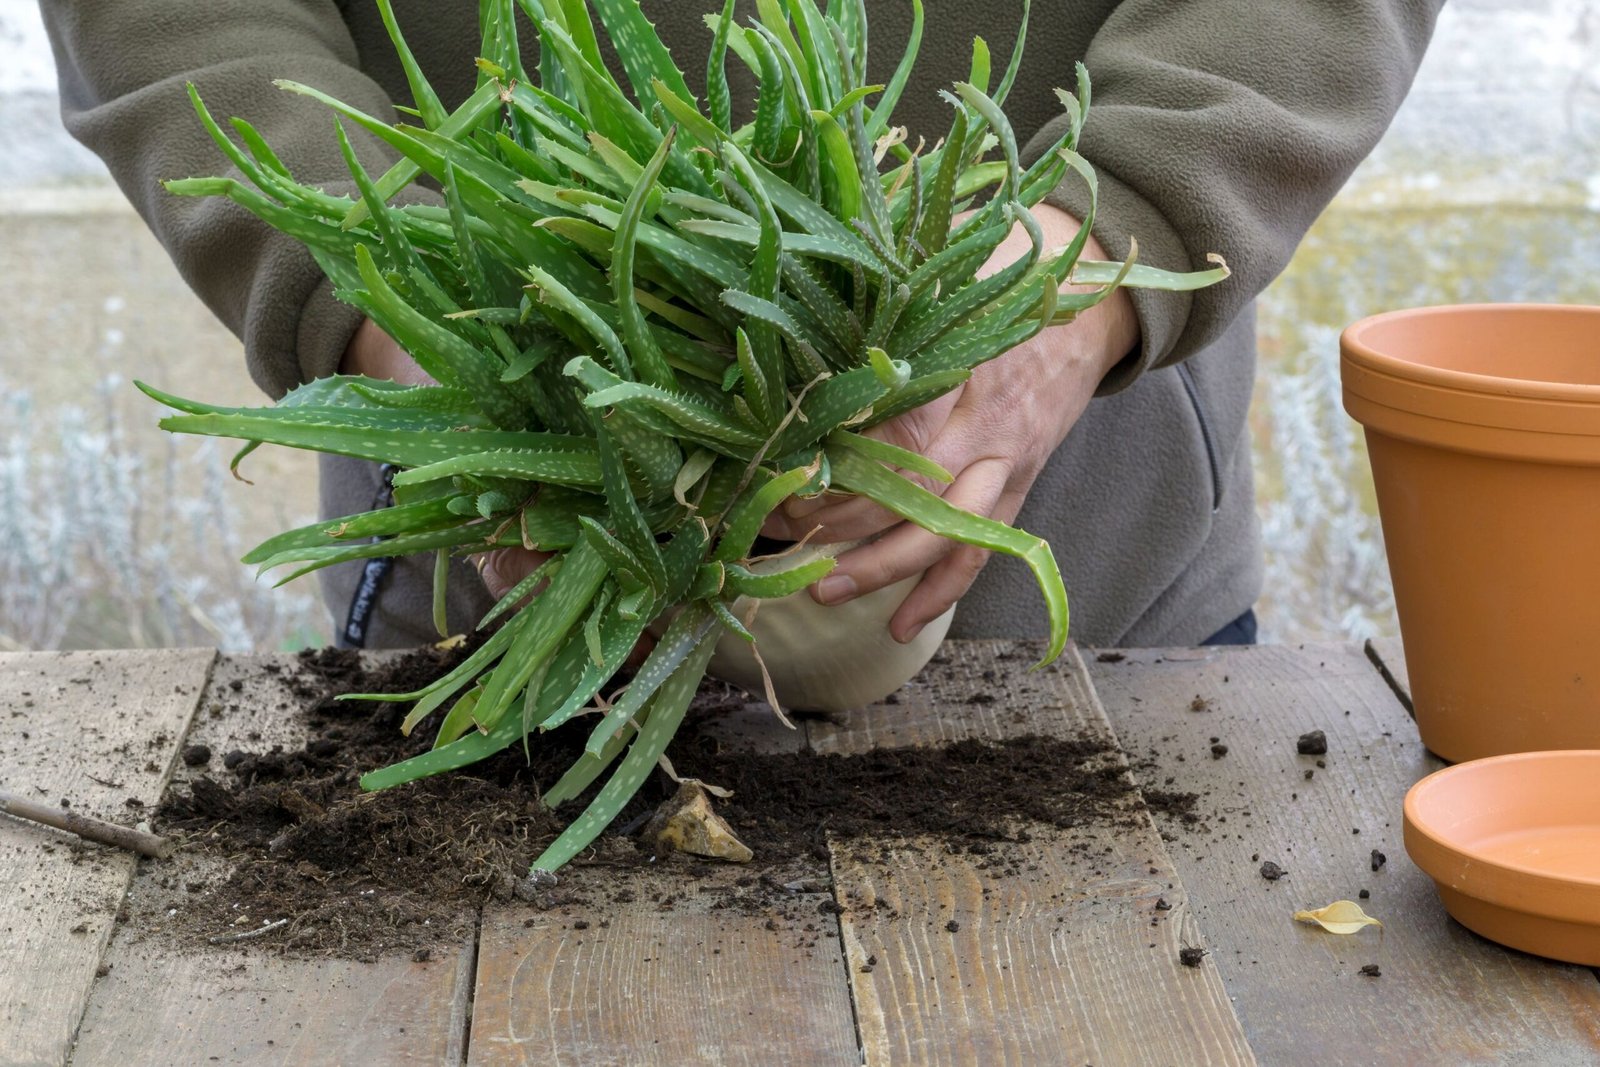
Step 4: Remove the Aloe from Its Current Pot
- Gently tip the pot on its side and ease the plant out, supporting the base of the rosette.
- Avoid pulling by the leaves—they are delicate and can break easily.
- If roots are tightly bound, gently tease them apart to encourage expansion in the new pot.
- Remove any dead or mushy roots, as these can spread rot in the fresh soil.
Step 5: Inspect and Trim the Plant
Before planting, take a moment to assess the aloe:
- Remove any brown, dried, or damaged leaves at the base.
- Trim offsets (pups) if you want to propagate new plants separately.
- Inspect for pests like mealybugs or scale, and treat with rubbing alcohol or insecticidal soap if necessary.
Healthy leaves and roots give the plant a strong start in its new pot.
Step 6: Planting in the New Pot
- Add a layer of fresh succulent soil to the bottom of the new container.
- Place the aloe in the center, spreading roots gently.
- Fill around the roots with soil, leaving the base of the leaves slightly above soil level to prevent rot.
- Press soil lightly but don’t compact it too much, as loose soil encourages root growth and proper drainage.
Avoid burying the leaves, as aloe prefers its rosette above the soil line.
Step 7: Watering After Repotting
After repotting, resist the urge to water immediately. Aloe needs time to recover from transplant shock:
- Wait 3–5 days before the first watering.
- When you do water, give a light, thorough soak, allowing excess to drain.
- Let the soil dry completely before watering again; aloe thrives in dry intervals between waterings.
Proper watering is critical to prevent root rot, especially in newly repotted plants.
Step 8: Post-Repotting Care
Once your aloe is settled in its new pot, provide the following care:
- Light: Place in a bright, indirect sunlight location. Aloe prefers 6–8 hours of light daily but avoid harsh afternoon sun initially, which can scorch newly disturbed leaves.
- Temperature: Maintain indoor temperatures between 60–75°F (15–24°C). Aloe is frost-sensitive, so keep away from drafts or cold windows.
- Fertilization: Wait at least 4–6 weeks before applying fertilizer to avoid stressing roots. Use a diluted succulent fertilizer during the growing season for optimal growth.
- Monitor Growth: Watch for new leaf formation as a sign your aloe is thriving in its new home.
Bonus Tips for Thriving Aloe Vera
- Rotate the Pot: Turn the pot periodically so all sides get equal light and prevent the plant from leaning.
- Propagation Opportunities: Remove offsets (pups) during repotting and plant separately to expand your indoor aloe collection.
- Avoid Overwatering: Even in humid climates, succulents like aloe need well-drained soil and infrequent watering.
- Leaf Care: Wipe leaves with a soft cloth occasionally to remove dust and improve light absorption.
Common Mistakes to Avoid
- Using a Pot Without Drainage: Aloe roots can rot in standing water. Always use a pot with drainage holes.
- Overwatering Post-Repot: Watering immediately or too frequently can lead to root rot. Let the plant adjust first.
- Burying the Leaves: Soil covering the rosette base increases risk of rot. Keep the leaves slightly above soil.
- Planting in Heavy Soil: Dense garden soil retains moisture; always use a light, well-draining mix.
- Exposing Newly Repotted Aloe to Direct Sun: Sudden sun exposure can scorch leaves; gradually acclimate the plant.
Why Repotting Is Essential
Repotting isn’t just about giving aloe more space—it also:
- Refreshes soil nutrients that may be depleted.
- Prevents root crowding, which can stunt growth.
- Reduces pest and fungal issues by eliminating old, contaminated soil.
- Encourages stronger growth, both above and below ground.
With proper repotting and care, an aloe plant can thrive indoors for decades, providing beauty, air purification, and medicinal benefits.
Conclusion
Repotting your aloe vera plant is a simple yet crucial task to maintain its health and vitality. By following these eight steps—timing, choosing the right pot, preparing soil, removing the plant, trimming, planting, watering, and post-repotting care—you can ensure your aloe thrives for years to come.
Remember: aloe vera is forgiving but benefits from proper handling. Provide a bright spot, well-draining soil, and careful watering, and you’ll be rewarded with vibrant leaves and a flourishing plant.
With regular care and occasional repotting, your aloe vera becomes more than just a plant—it becomes a long-lasting, resilient centerpiece of your indoor garden.