Overwintering plant cuttings is a crucial skill for gardeners who want to preserve favorite plants, propagate new ones, or get a head start on the next growing season. Cold frames provide a controlled, frost-protected environment that allows cuttings to survive winter and remain ready for planting in spring.
This guide explains how to overwinter plant cuttings successfully using a cold frame, covering preparation, placement, maintenance, and troubleshooting.
Why Overwinter Cuttings Matters
- Preserves valuable plants: Protects perennials, shrubs, and tender plants
- Saves money: Reduces the need to buy new plants in spring
- Supports propagation: Allows gardeners to root new plants from cuttings
- Early spring advantage: Plants are ready to thrive as soon as the growing season starts
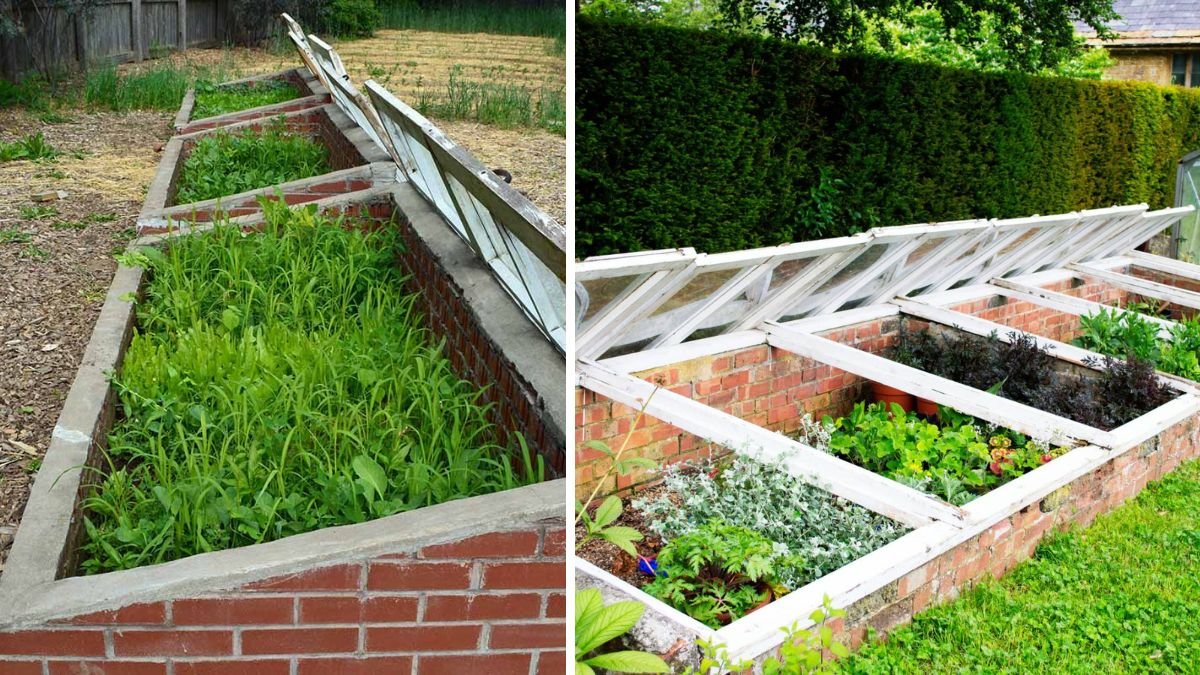
What Is a Cold Frame?
A cold frame is a low, box-like structure with a transparent top, usually made from glass or clear plastic, that captures sunlight and retains warmth. It:
- Provides protection from frost, wind, and snow
- Maintains a slightly warmer microclimate than the surrounding air
- Helps regulate moisture and humidity for delicate cuttings
Cold frames are simple to build or purchase, making them an essential tool for winter gardening.
Preparing Your Cold Frame
1. Choose the Right Location
- Place where it gets maximum sunlight, especially during winter
- Avoid low spots that collect cold air or water
2. Prepare the Soil
- Fill the cold frame with well-draining soil or potting mix
- Raise cuttings slightly using pots or trays for better air circulation
3. Insulate
- Add straw, bubble wrap, or horticultural fleece around the edges for extra warmth
- Consider using clear plastic over the lid at night for added frost protection
Selecting and Preparing Cuttings
- Use healthy, disease-free stems from your plants
- Softwood cuttings: Early summer to early autumn
- Hardwood cuttings: Late autumn to early winter
- Trim leaves to reduce water loss, leaving 2–3 leaves on softwood cuttings
- Dip the base in rooting hormone to encourage root development
Planting Cuttings in the Cold Frame
- Fill pots or trays with moist, well-draining mix
- Insert cuttings carefully, firming soil around the stem
- Space cuttings so leaves don’t touch each other, allowing airflow
- Label cuttings with plant type and date
Cold Frame Maintenance
- Watering: Keep soil moist but not soggy; check regularly
- Ventilation: Open lids on sunny days to prevent overheating and fungal growth
- Temperature monitoring: Maintain a consistent 40–60°F (4–15°C) for most cuttings
- Light exposure: Ensure cuttings receive indirect sunlight; avoid harsh midday sun
Common Problems and Solutions
- Mold or fungus: Reduce humidity and improve airflow; remove affected cuttings
- Frozen cuttings: Provide extra insulation or use a heated mat
- Leggy growth: Rotate trays for even light distribution
Transitioning Cuttings in Spring
- Gradually acclimate cuttings to outdoor conditions by opening the cold frame during the day
- Start hardening off in a sheltered spot before full sun exposure
- Transplant once risk of frost has passed
Tips for Success
- Check cuttings weekly for signs of growth or stress
- Remove dead or damaged material promptly
- Rotate different plant types for balanced growth
Final Thoughts
A cold frame is a simple but powerful tool that allows gardeners to overwinter plant cuttings successfully. With proper preparation, careful maintenance, and attention to temperature and moisture, your cuttings can survive winter and thrive in spring, giving your garden a strong start and a head start on new plants.