Introduction: Why Repotting Orchids Matters
Orchids are some of the most admired indoor plants worldwide, prized for their elegant blooms, long-lasting flowers, and exotic appeal. While orchids do not require frequent repotting like some houseplants, doing it correctly is essential for their long-term health. Repotting helps prevent root rot, encourages strong root and leaf growth, and ensures your orchid will produce vibrant blooms year after year.
In 2026, more indoor gardeners are taking care to repot orchids at the right time with the right techniques, using proper orchid-specific media and gentle methods. Whether you are a beginner or an experienced grower, knowing when and how to repot your orchid can make a significant difference in its longevity and overall health.
Signs Your Orchid Needs Repotting
Before starting, it’s important to know if your orchid truly needs repotting. Key indicators include:
- Roots growing out of the pot: This suggests your plant has outgrown its container. (womanandhome.com)
- Broken-down potting medium: Old media can become compacted and retain too much water, leading to root damage. (garvillo.com)
- Water pooling on the surface: If water does not drain quickly, the roots may suffocate. (plantopia.video)
- Reduced growth or fewer blooms: When orchids become root-bound or the medium deteriorates, their growth and flowering can suffer. (gardenerspath.com)
Typically, orchids benefit from repotting every 12–18 months, though the exact timing can vary depending on species and indoor conditions. (easygarden.ie)
Best Time to Repot Your Orchid
The ideal time to repot orchids is after they finish flowering, usually in late spring or early summer. Repotting during bloom can stress the plant and may lead to premature flower drop.
Another cue is new root growth; if healthy roots are emerging outside the potting media, it’s the perfect opportunity to repot. Ensuring your orchid has the right conditions and timing reduces stress and helps the plant adapt quickly to its new home. (thespruce.com)
Tools and Materials Needed
Gathering the proper tools before you start makes repotting easier and safer for your orchid:
- Orchid-specific potting mix (bark or sphagnum moss)
- Orchid pot with drainage holes
- Sterilized pruning shears or scissors
- Optional: Fungicide to protect trimmed roots
- Watering can for aftercare
- Gardening gloves to handle the plant
💡 Tip: Choose a pot that is only slightly larger than the current one. Orchids prefer snug spaces, which encourage healthy root growth. (realsimple.com)
Step-by-Step Orchid Repotting Tutorial
1. Prepare the Plant
Water your orchid the day before repotting to soften the roots and make handling easier. This reduces stress and prevents roots from breaking during removal. (plantopia.video)
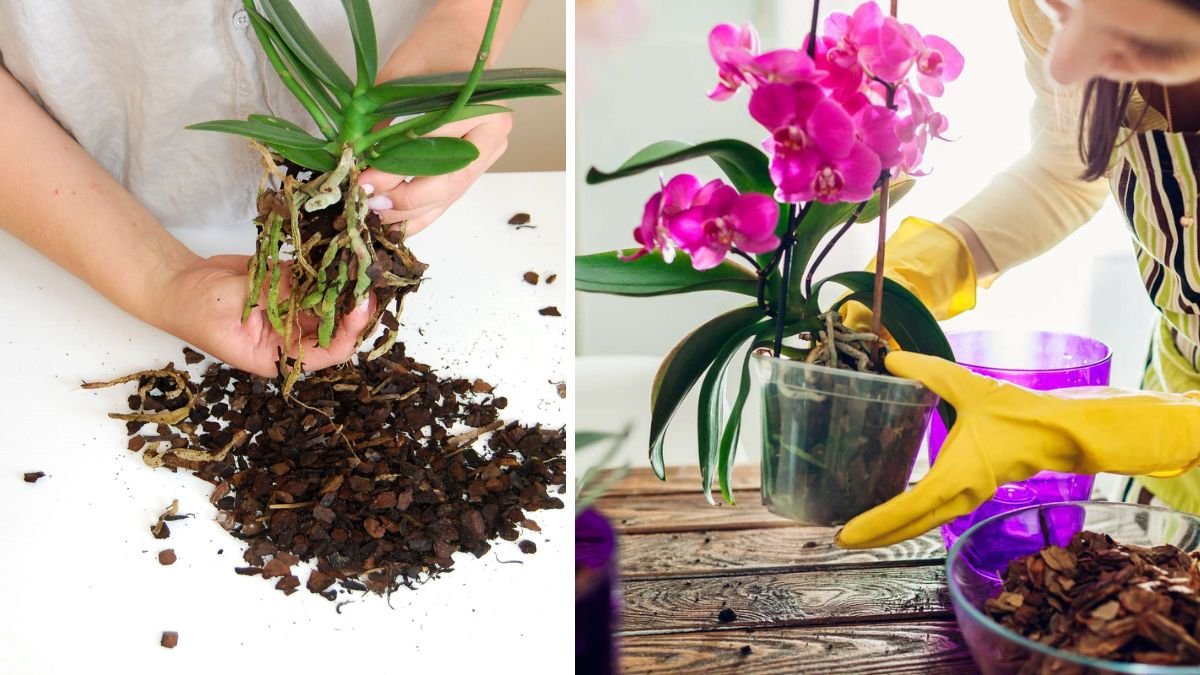
2. Remove the Orchid from Its Current Pot
Gently slide the orchid out of its pot. Apply light pressure on the sides of the pot to loosen the root ball if necessary. Avoid pulling on the leaves or flower spikes.
3. Inspect and Trim the Roots
Check each root carefully. Trim away dead, mushy, or damaged roots using sterilized scissors. Healthy roots are firm and typically green or silvery. If desired, dip the trimmed roots in a fungicide to prevent infection. (realsimple.com)
4. Prepare the New Pot
Add a layer of fresh orchid potting medium at the bottom of the new pot. Position the orchid so that the base sits slightly above the surface of the medium.
5. Add New Potting Medium
Fill around the roots with fresh potting mix. Be careful not to pack the medium too tightly; orchids need air circulation around their roots to prevent rot.
6. Water Lightly
Water your orchid lightly after repotting to settle the new medium. Avoid overwatering at this stage, as the roots may be sensitive. (womanandhome.com)
7. Place in the Right Environment
Keep your orchid in bright, indirect light for the first few weeks. Avoid direct sunlight or drafts while it recovers. Once established, return to your usual care routine. (easygarden.ie)
Aftercare: Keeping Your Orchid Healthy
After repotting, proper aftercare ensures a smooth transition and healthy growth:
- Humidity: Orchids thrive in moderate humidity. Use a humidity tray or mist the leaves regularly. (agrifarming.in)
- Watering: Water once every 7–10 days, allowing the medium to dry slightly between watering sessions. (bhg.com)
- Fertilization: Feed with a balanced orchid fertilizer during the growing season to promote root and flower development. (easygarden.ie)
- Air Circulation: Ensure your orchid is not overcrowded and receives good airflow to prevent fungal issues.
Common Mistakes to Avoid
- Repotting too frequently: Orchids do not need annual repotting unless there is a specific issue with roots or media. (realsimple.com)
- Repotting during bloom: This can stress the plant and cause flower loss. (thespruce.com)
- Using regular potting soil: Dense soil compacts orchid roots and can cause rot. Always use orchid-specific media. (gardenerspath.com)
Authoritative Sources for Orchid Repotting
For more detailed tutorials, visuals, and expert advice, consult:
- Easy Garden Centre – Step-by-Step Orchid Repotting Guide (easygarden.ie)
- OrchidWeb – Repotting Tips & Tricks (orchidweb.com)
- Gardeners Path – When and How to Repot Orchids (gardenerspath.com)
- Real Simple – Orchid Repotting Advice (realsimple.com)
These resources offer step-by-step instructions, tips for selecting media and pots, and detailed aftercare guidance.
Final Thoughts
Repotting orchids doesn’t have to be intimidating. With the right timing, tools, and techniques, you can revive roots, encourage growth, and support vibrant blooms year after year. Orchids repotted with fresh media and given proper post-repotting care thrive more readily, produce more flowers, and avoid common root problems.
Whether you are repotting your first orchid or refining your skills, following these simple steps ensures success. Orchids are long-lived plants, and careful repotting is one of the most effective ways to extend their life and beauty.
Take the time to repot correctly, and enjoy the rewarding experience of watching your orchids flourish in their new environment.