Chilies are one of the most rewarding and versatile plants to grow at home. Their bright fruits add color, flavor, and nutrition to your meals, and homegrown chilies often taste far better than store-bought ones. Yet, many people assume that growing chilies requires experience, expensive tools, or a garden. A recent viral story titled “Just Chili Seeds And Few Stones? Why Didn’t I Know How to Grow This Chili Sooner!” proves otherwise. With just seeds, basic soil, and a few stones, a home gardener was able to produce healthy, fruiting chili plants — and the results amazed the online gardening community.
This article explores how this simple method works, provides expert-backed tips to improve yield, and explains how even beginners can grow chilies successfully.
Why This Method Went Viral
Most chili growing guides focus on perfect soil, fertilizers, and careful irrigation. But this viral video emphasized simplicity and accessibility. By planting soaked seeds in ordinary soil with a few stones added for drainage and temperature stability, the gardener demonstrated that anyone can start growing chilies with minimal resources.
The method quickly attracted attention on social media and gardening forums because it made chili cultivation feel possible for beginners, apartment dwellers, and those on a tight budget. Gardeners were inspired by how little it took to get healthy plants producing fruit.
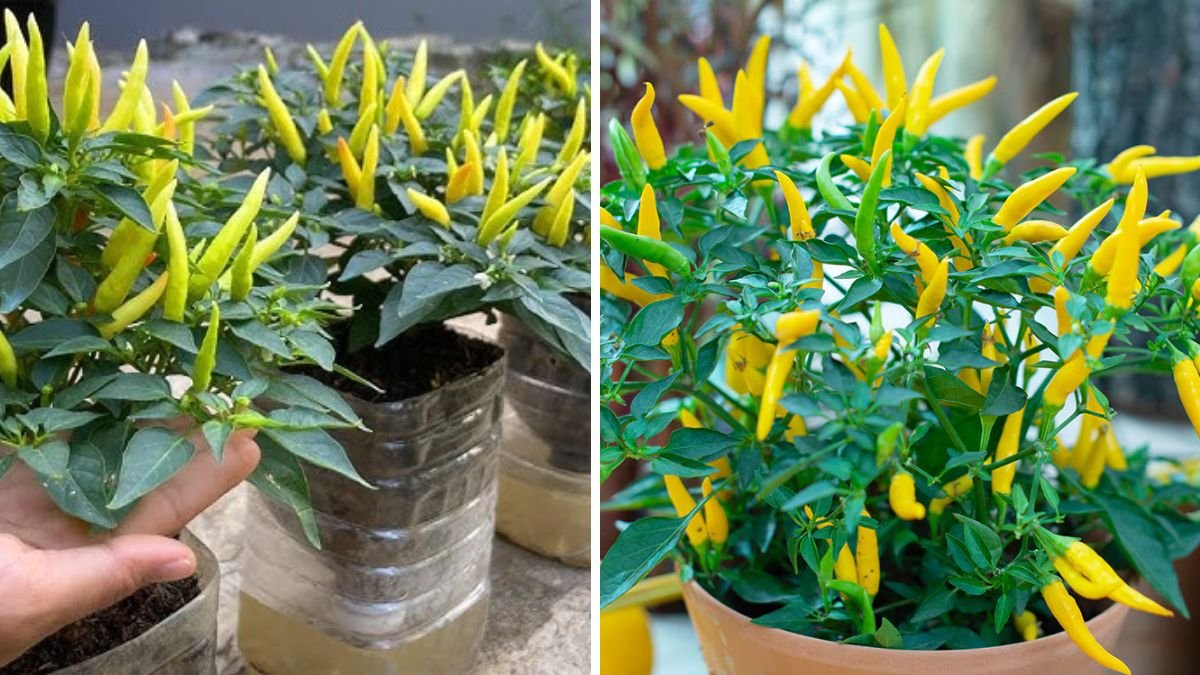
Understanding Chilli Plants
Chilies (Capsicum species) are warm-season crops that thrive in sunny conditions and well-draining soil. They are relatively low-maintenance once established and produce an abundant harvest when given the right care.
Key characteristics of chili plants include:
- Climatic preference: Warm temperatures and plenty of sunlight.
- Soil requirement: Well-drained, fertile soil with a pH between 6.0 and 7.0.
- Growth habit: Bushy or semi-bushy, with the potential to produce fruit for months under proper care.
Even small containers or urban balcony setups can successfully grow chili plants if these conditions are met. (extension.umn.edu)
Step 1: Seed Preparation
The first secret to success is preparing the seeds properly. Saving seeds from ripe chilies or purchasing high-quality seeds ensures better germination. Soaking seeds in lukewarm water for 3–8 hours softens the seed coat and accelerates germination. This step is especially useful for beginners who want quick results.
Seeds should be planted shallowly, about 0.5–1 cm deep, in soil that retains moisture without being waterlogged. Overly wet conditions can cause seeds to rot. (pepperseeds.eu)
Step 2: Choosing Your Growing Medium
The viral method includes a few stones mixed into the soil. While this may seem symbolic, stones actually have practical benefits:
- Improved drainage: Prevents roots from sitting in excess water, reducing rot.
- Temperature stability: Stones absorb heat during the day and release it slowly at night, creating a microclimate that favors seedling growth.
A recycled container, pot, or small garden bed can serve as a planting site. Ensure the container has drainage holes, and mix ordinary soil with organic compost for nutrients.
Step 3: Planting the Seeds
Place soaked seeds in your prepared soil and cover them lightly. Water gently to moisten the soil. Within 7–14 days, seeds should begin to sprout under optimal conditions.
For indoor setups, position containers in a sunny window or under grow lights. For outdoor setups, ensure the seeds receive at least 6 hours of direct sunlight daily. (gardening.alibaba.com)
Step 4: Watering and Care
Chilies prefer moderately moist soil. Water when the top inch of soil feels dry, avoiding overwatering which can cause root rot. Mulching with straw or leaves helps retain moisture and maintain a steady soil temperature.
As seedlings grow, thin them if multiple seeds were planted in one spot to prevent overcrowding. Proper spacing allows air circulation and reduces disease pressure. (extension.umn.edu)
Step 5: Supporting Growth
Some chili varieties grow bushy, while others may benefit from staking or small trellises to support branches laden with fruit. Even a simple bamboo stick or stake in a pot can prevent stems from bending or breaking.
Step 6: Fertilization
Once seedlings are a few inches tall, feed them with a balanced fertilizer or organic compost. Avoid excessive nitrogen, which encourages leafy growth but reduces flowering and fruiting.
Regular feeding improves vigor, encourages more blossoms, and results in higher fruit yield. (gardening.alibaba.com)
Step 7: Pollination
Chili flowers rely on insects for pollination. Indoors, hand-pollination using a soft brush can transfer pollen from male to female flowers. Proper pollination is crucial for fruit set and continuous production.
Expected Timeline and Harvest
- Germination: 7–14 days after sowing.
- Seedling stage: 3–4 weeks.
- Flowering: 6–8 weeks after germination.
- Harvesting: Depending on variety, fruits are ready in 10–14 weeks from sowing.
Harvest chilies regularly once ripe. Most varieties change color from green to red, yellow, or orange. Regular picking encourages new fruit production.
Common Mistakes to Avoid
- Overwatering: Can kill seedlings or lead to root rot.
- Insufficient light: Weak, leggy plants with poor fruiting.
- Neglecting drainage: A few stones help, but containers must also drain well.
- Excess nitrogen: Promotes leaves over fruit.
By avoiding these pitfalls, even beginners can produce healthy, fruiting chili plants with minimal effort.
Why This Method Works
The viral method emphasizes simplicity, accessibility, and observation. While a few stones seem trivial, the real success comes from:
- Seed preparation – soaking and proper planting depth.
- Well-drained soil – preventing waterlogging.
- Consistent sunlight and warmth – promoting growth.
- Moderate water and nutrients – supporting strong plants.
It’s a reminder that gardening doesn’t need to be complicated — small, thoughtful steps can yield great results.
Real-World Feedback
Urban gardeners and beginners have tried this method with success. Even in apartments or small terraces, they report abundant harvests. Reddit threads and gardening forums highlight that minimal tools, simple containers, and careful observation are often all that’s needed to grow peppers effectively.
Authoritative Resources for Further Learning
- Chili Seed Sowing Instructions — Tips for depth, germination, and optimal conditions. (pepperseeds.eu)
- Chili Plant Care Essentials — Guidance on watering, sunlight, and fertilizers. (gardening.alibaba.com)
- University of Minnesota Extension: Growing Peppers — Science-backed information on spacing, soil, and harvesting. (extension.umn.edu)
These sources combine practical tips with expert research to ensure your chili plants thrive.
Conclusion
The viral story of “Just Chili Seeds And Few Stones” is inspiring because it demonstrates that gardening is accessible to everyone. You don’t need expensive tools, a backyard, or advanced knowledge. With a few basic materials, some care, and a little patience, anyone can grow healthy, productive chili plants at home.
This method reminds us that simplicity, observation, and consistency are often more important than complex techniques. For beginners, urban gardeners, and budget-conscious growers, chilies are a perfect starting point. Plant your seeds, add a few stones, and watch your garden — or balcony — transform with vibrant, spicy harvests.